Onboarding Guide: Get Started with Console
Feb 7, 2024
5 min

What can you do now? Step 3. Deploy Sub-Account
Once you create your main Console, it is time to create Sub-Accounts.
Go to Quick Action and click on Create Sub-Account.
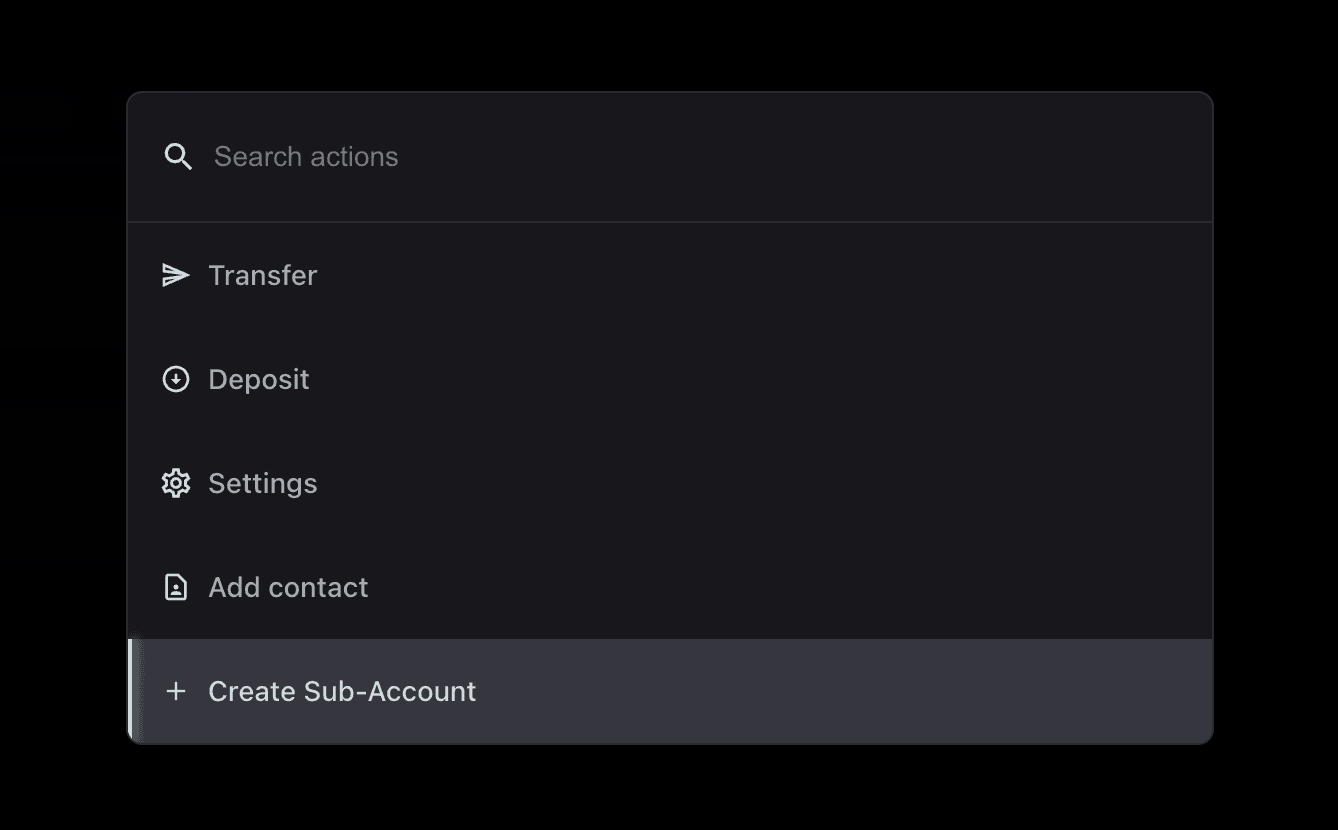
A Sub-Account is just another Safe, owned and controlled by your main Safe. The creation of Sub-Accounts is fundamental as it allows teams and individuals to segregate risk across different accounts, and to create different execution thresholds for more recurring operations of lesser value.
Operating from a multi-sig is cumbersome and may require multiple signatures and coordination among team members at all times across different time zones.
With Sub-Accounts, you can
Create a Safe with a lower threshold for governance and assign one of your team members to it.
Create a specific Sub-Account to distribute the payroll of your protocol.
Create Sub-Accounts for On-chain Farming, Automations, Treasury Management, and Operations, defining their different thresholds.
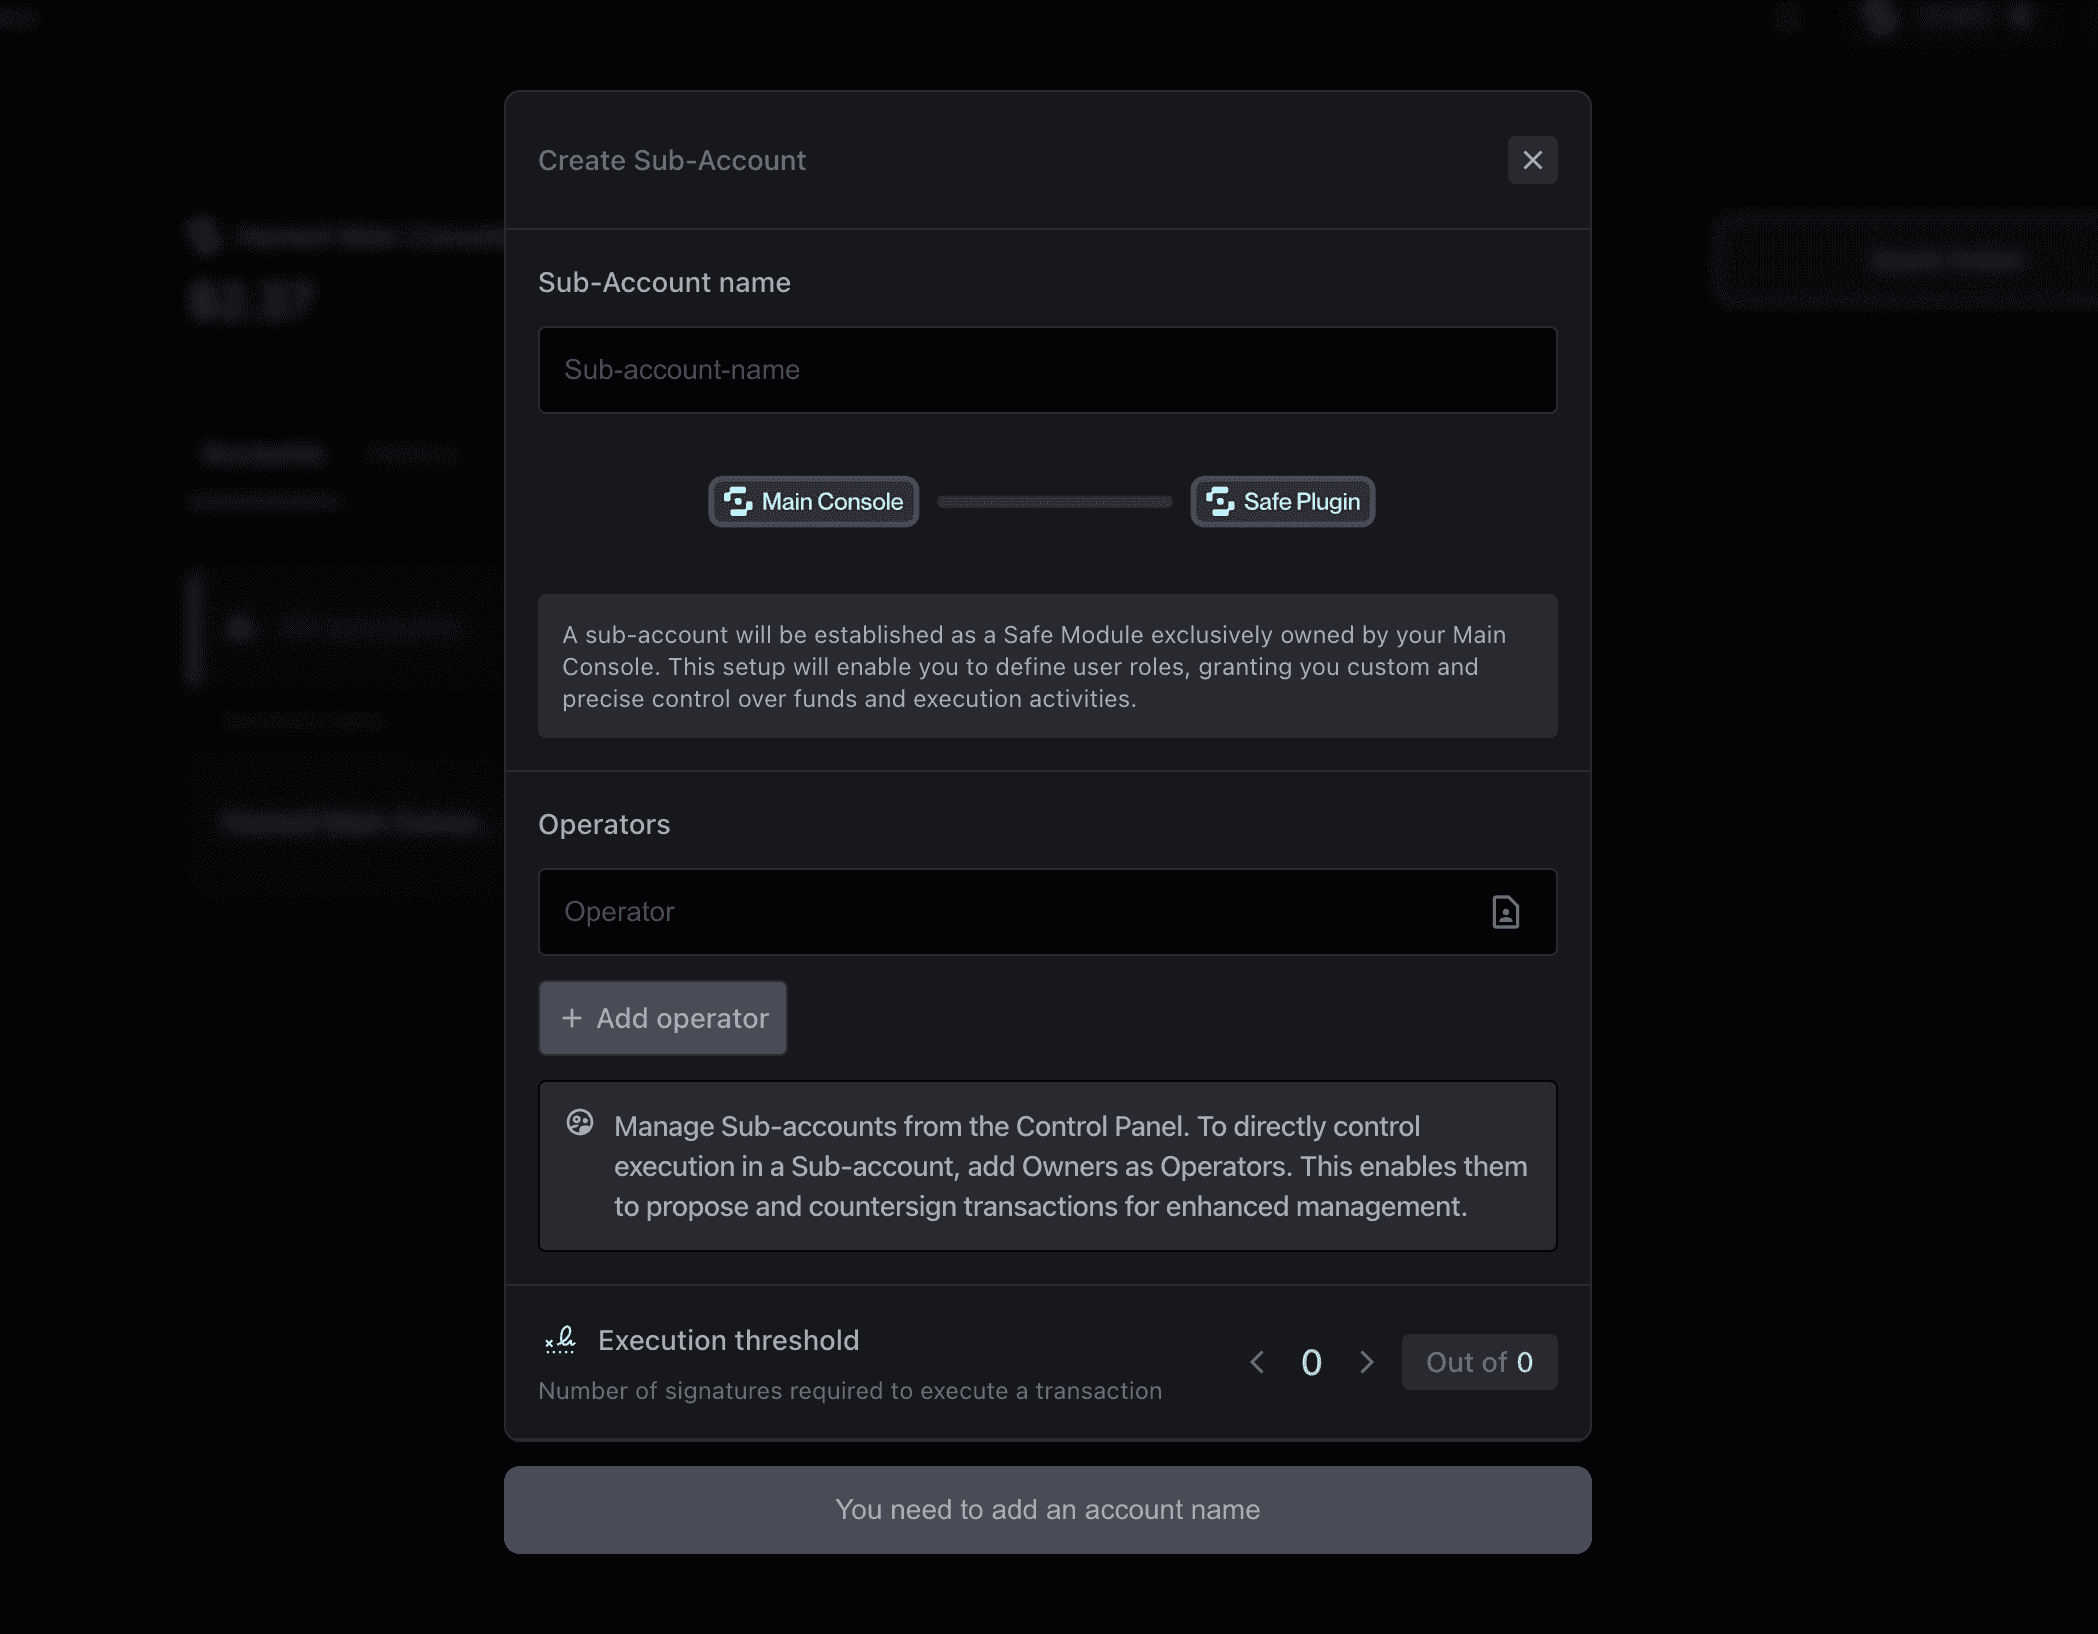
Creating a Sub-Account is quite straightforward
Define a name (e.g. Trading, Automations, Farming) according to the scope of the Sub-Accounts.
Define the Operators (the people from your team who are going to use the Sub-Account).
Define the execution Threshold.
Step 4. Create Policies
While Sub-Accounts by themselves do a great job in terms of risk segregation, Console also allows users to apply Policies to them. In simple words, Policies define the interactions that Sub-Account can or cannot do, based on their scope.
This adds an extra level of protection and ensures that all transactions not complying with the defined policies will not be executed automatically, thus ensuring trustless and effortless delegation.
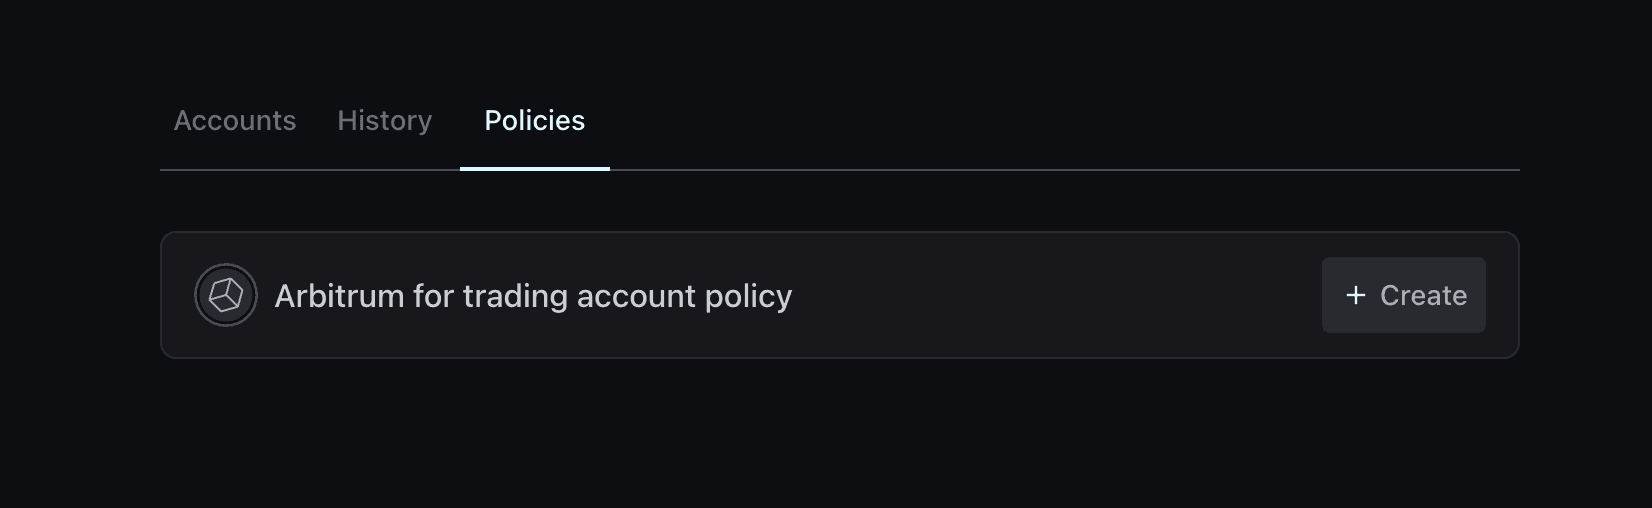
At all times, you can monitor a Sub-Account and see what Policies have been established on it.
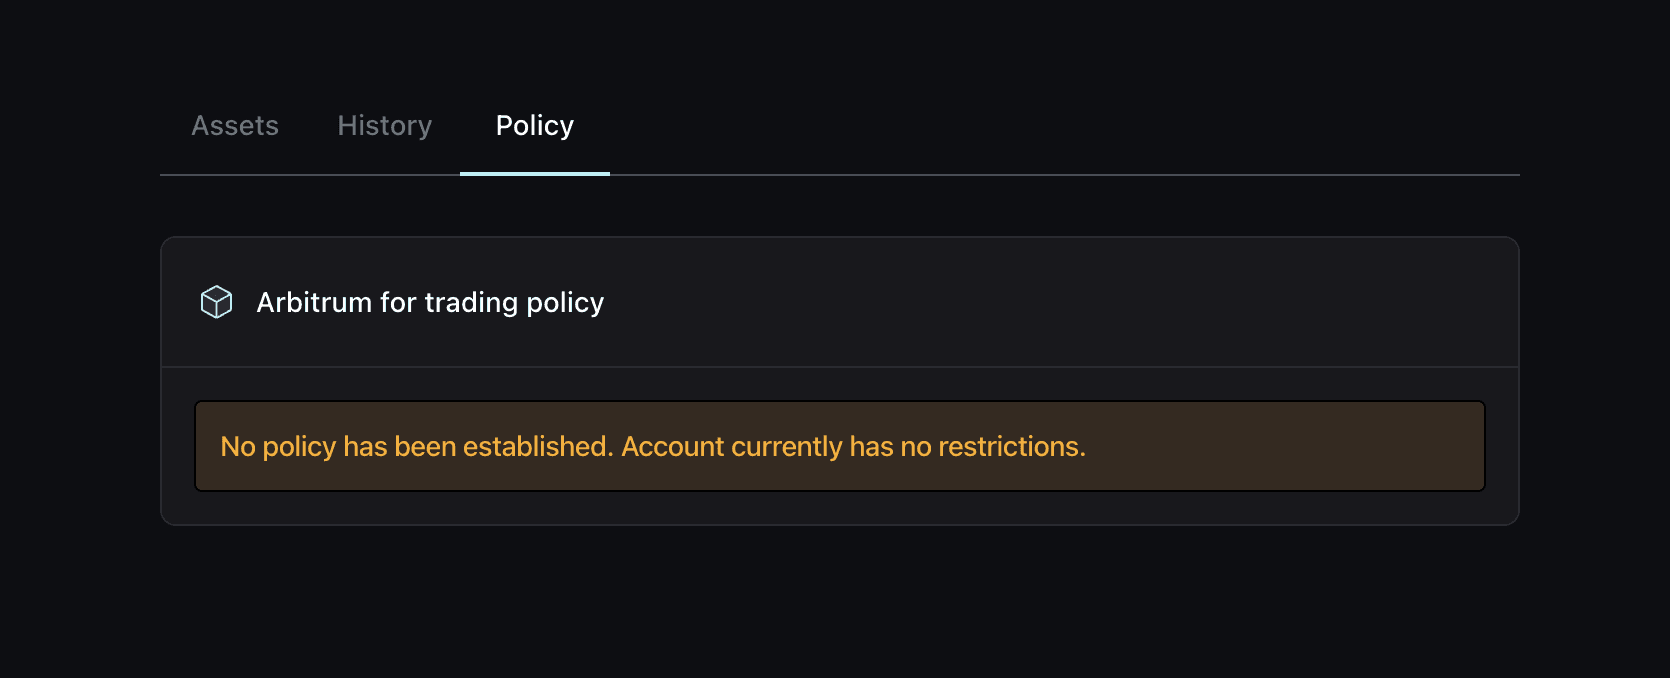
To create a new Policy, go to the Control Panel and click on Policies, where you can set out different policies for each created Sub-Account.
As we mentioned above, Policies are none other than sets of permissions that define what Operators on each Sub-Account can do.
Policies include
🔒 Global Policy. if activated, the Sub-Account in question can only send transactions to selected recipients, with specific limits for token usage. This means, for instance, that this Sub-Account can only send funds to the Main Console or to itself – but never to others. In case the Sub-Account operators tries to take funds out of their wallet, the transaction will automatically fail.
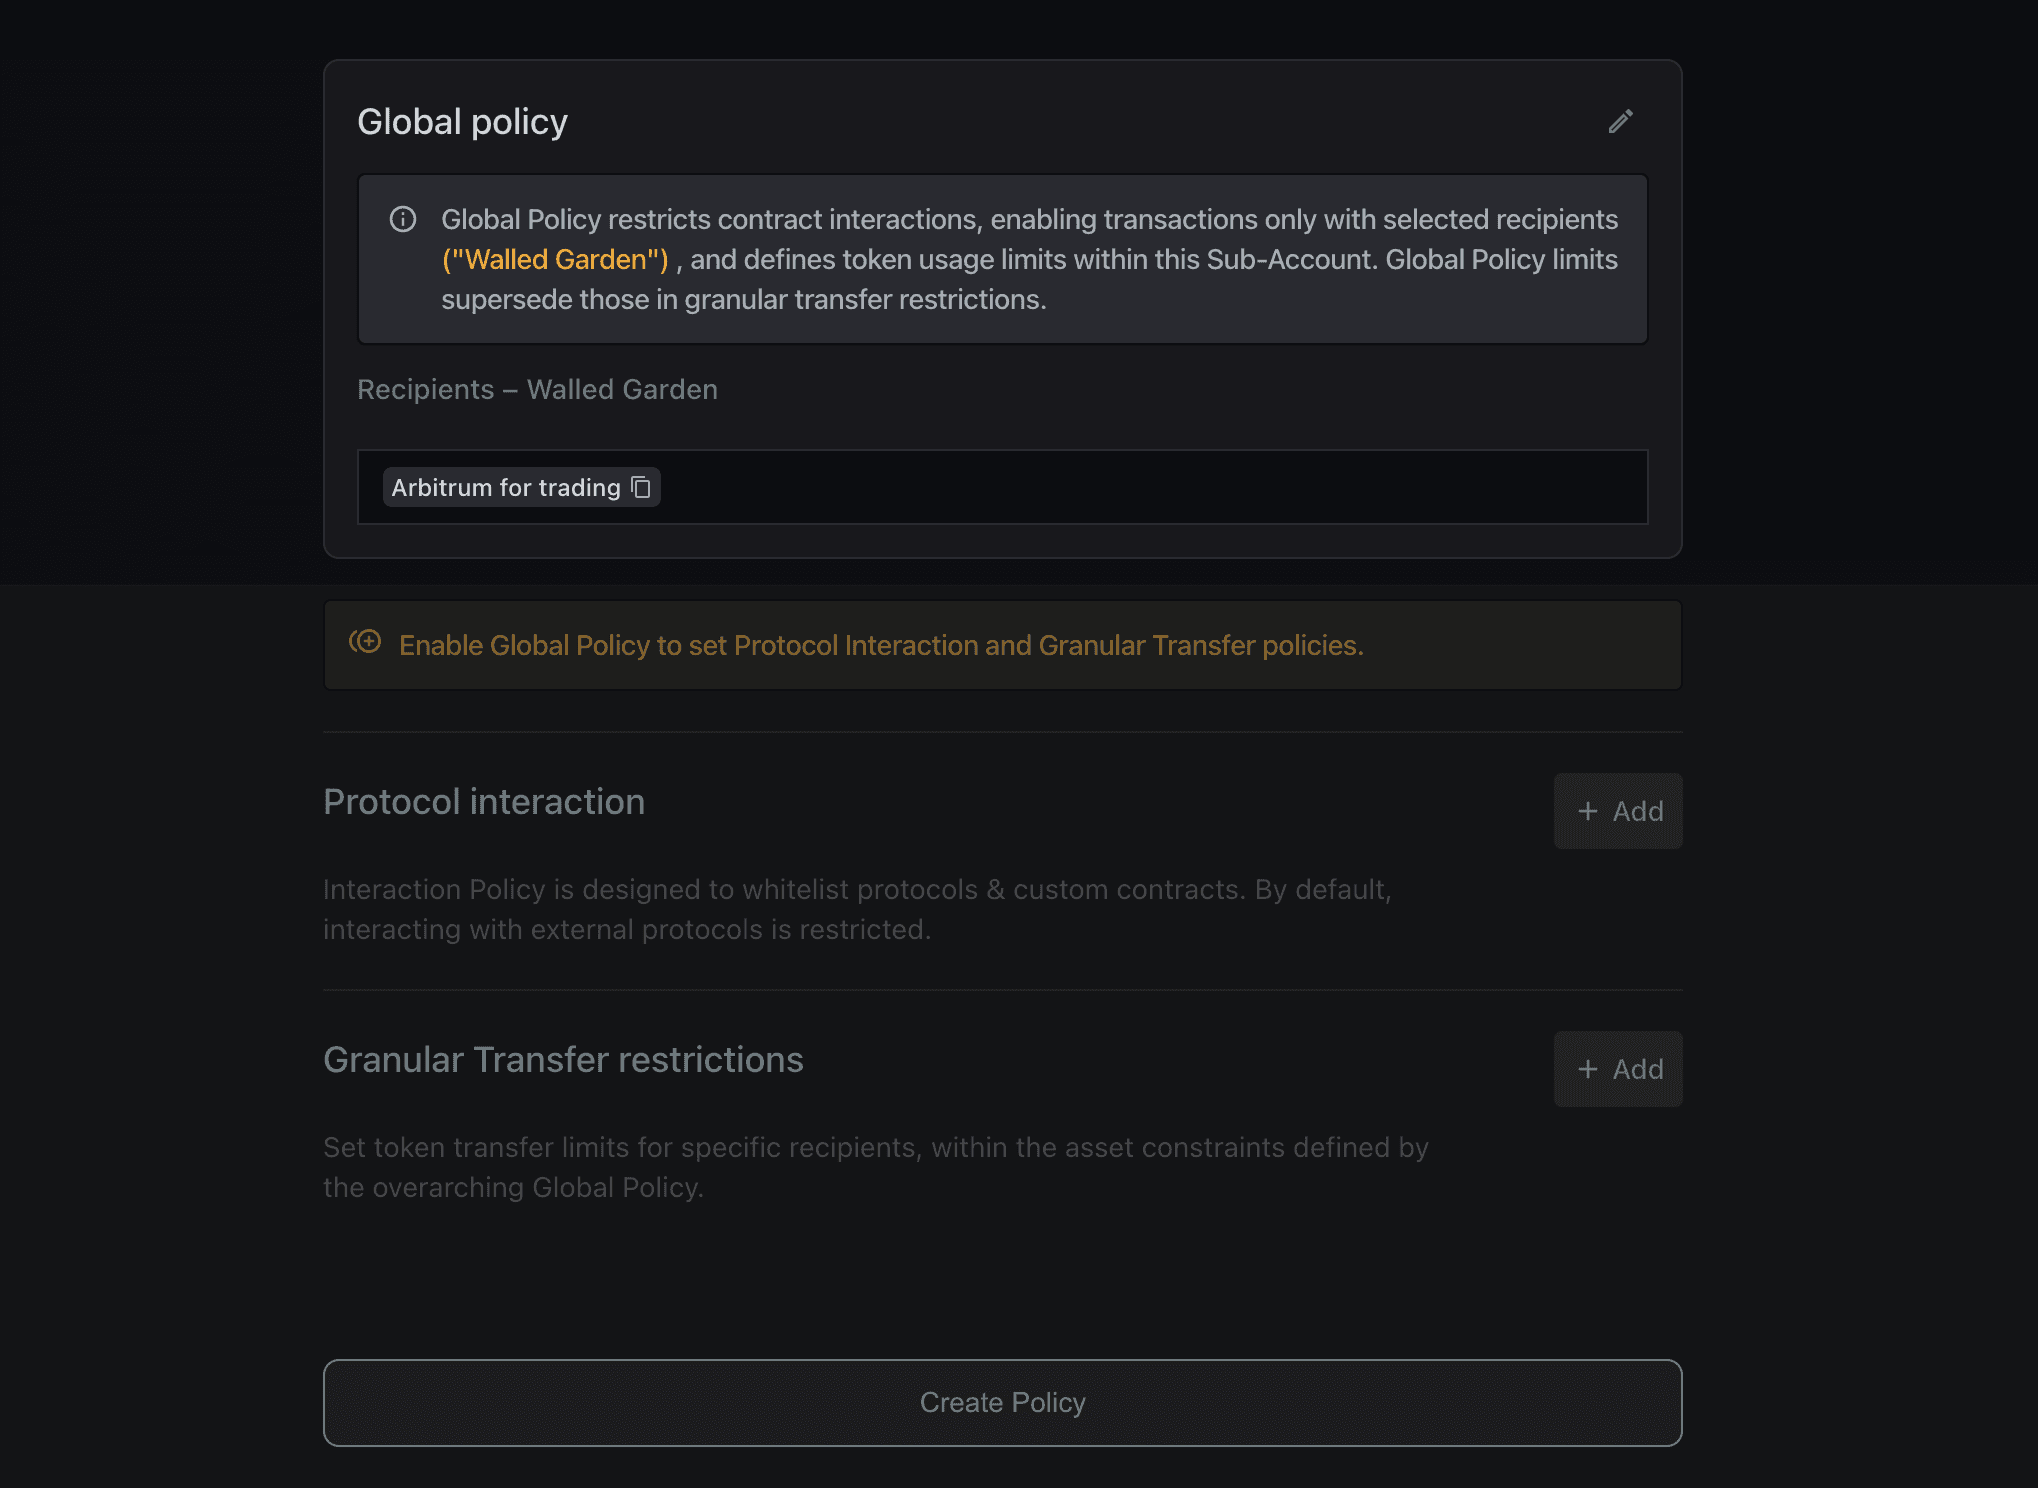
🔒 Protocol Interactions. Restrict the Sub-Account interactions at a protocol level, defining which protocol they can interact with, as well as further asset limits or certain thresholds based on specific timeframes (e.g., a swap-focused Sub-Account will only be able to Swap on Uniswap and for a maximum of 1 ETH per week).
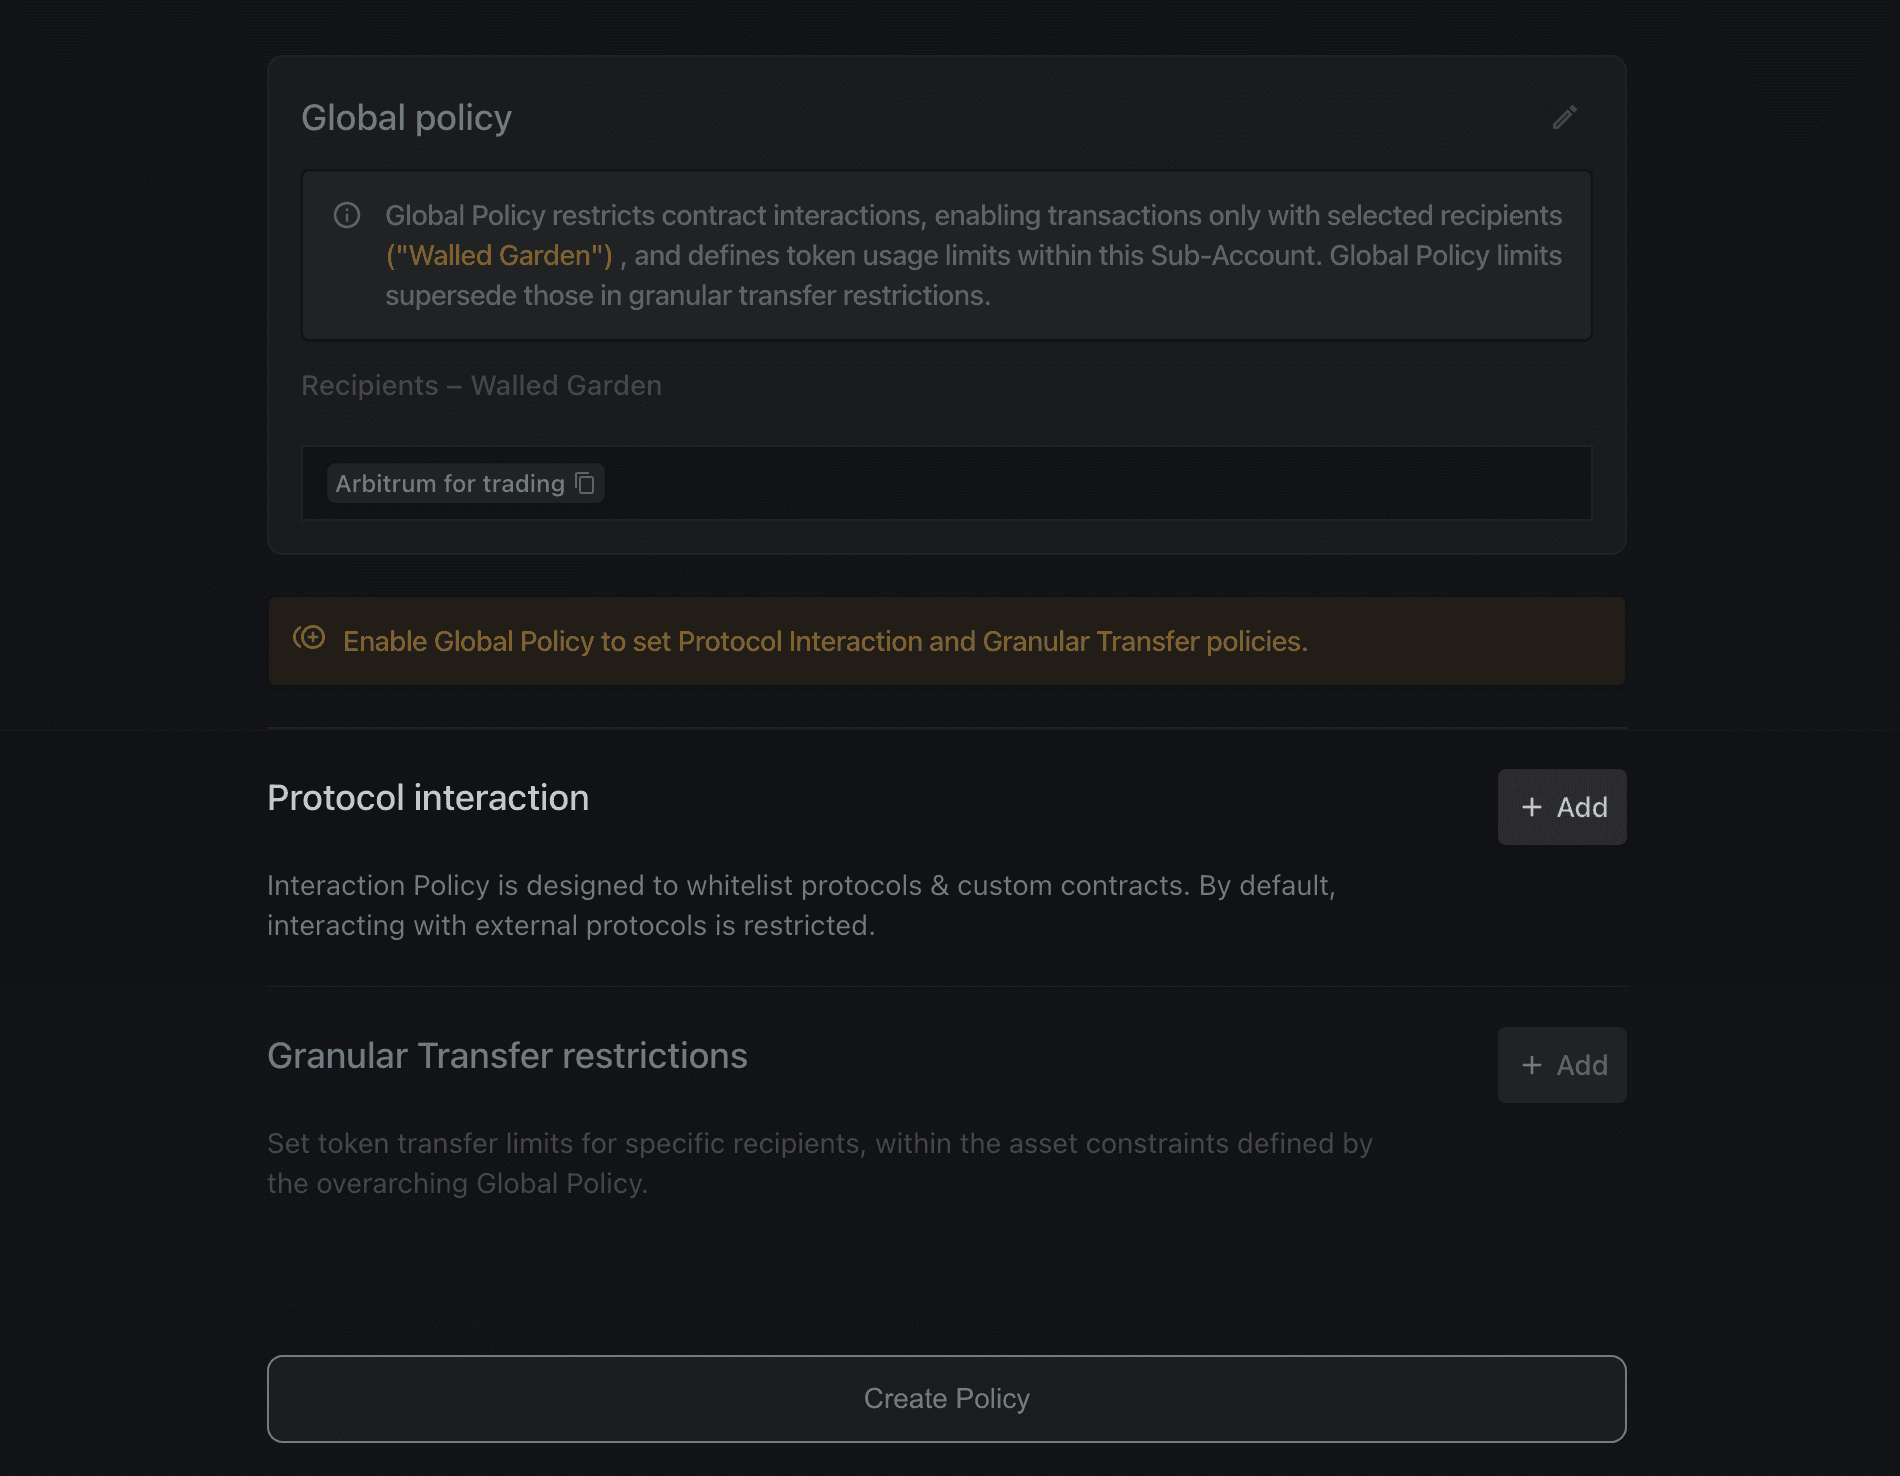
🔒 Granular Transfer restrictions. if you want to limit token transfers for specific recipients (under what was previously defined in the overarching Global Policy). For instance, a Sub-Account specific for payroll payments will only be able to send a certain amount of tokens to each address, according to their wage.
Policies complement Sub-Accounts with the definition of Access Control and overarching coordination from the main Console. With them, you can separate risk and operational functions efficiently across Sub-Accounts and delegate effortlessly.
No need for constant monitoring and control; the process is completely trustless, as all transactions that do not comply with the defined policies will automatically fail. We hope this guide resonates with you and can provide a deeper perspective on how you can start setting up your Console.
Our onboarding process is designed to be easy and efficient, taking only a few moments to complete. Users can initiate by linking a wallet, and either create or import a Safe with a single transaction. At all times, the Main Safe governs all administrative action with its on-chain signature threshold.
Once they onboard, users will gain full access of their Console account.
✅ Perform standard operations.
✅ Interact with dApps.
✅ Expand functionalities through Sub-Accounts.
Stay tuned for more updates, and join our Discord if you need support with the onboarding process and more ideas on what you can do on Console!
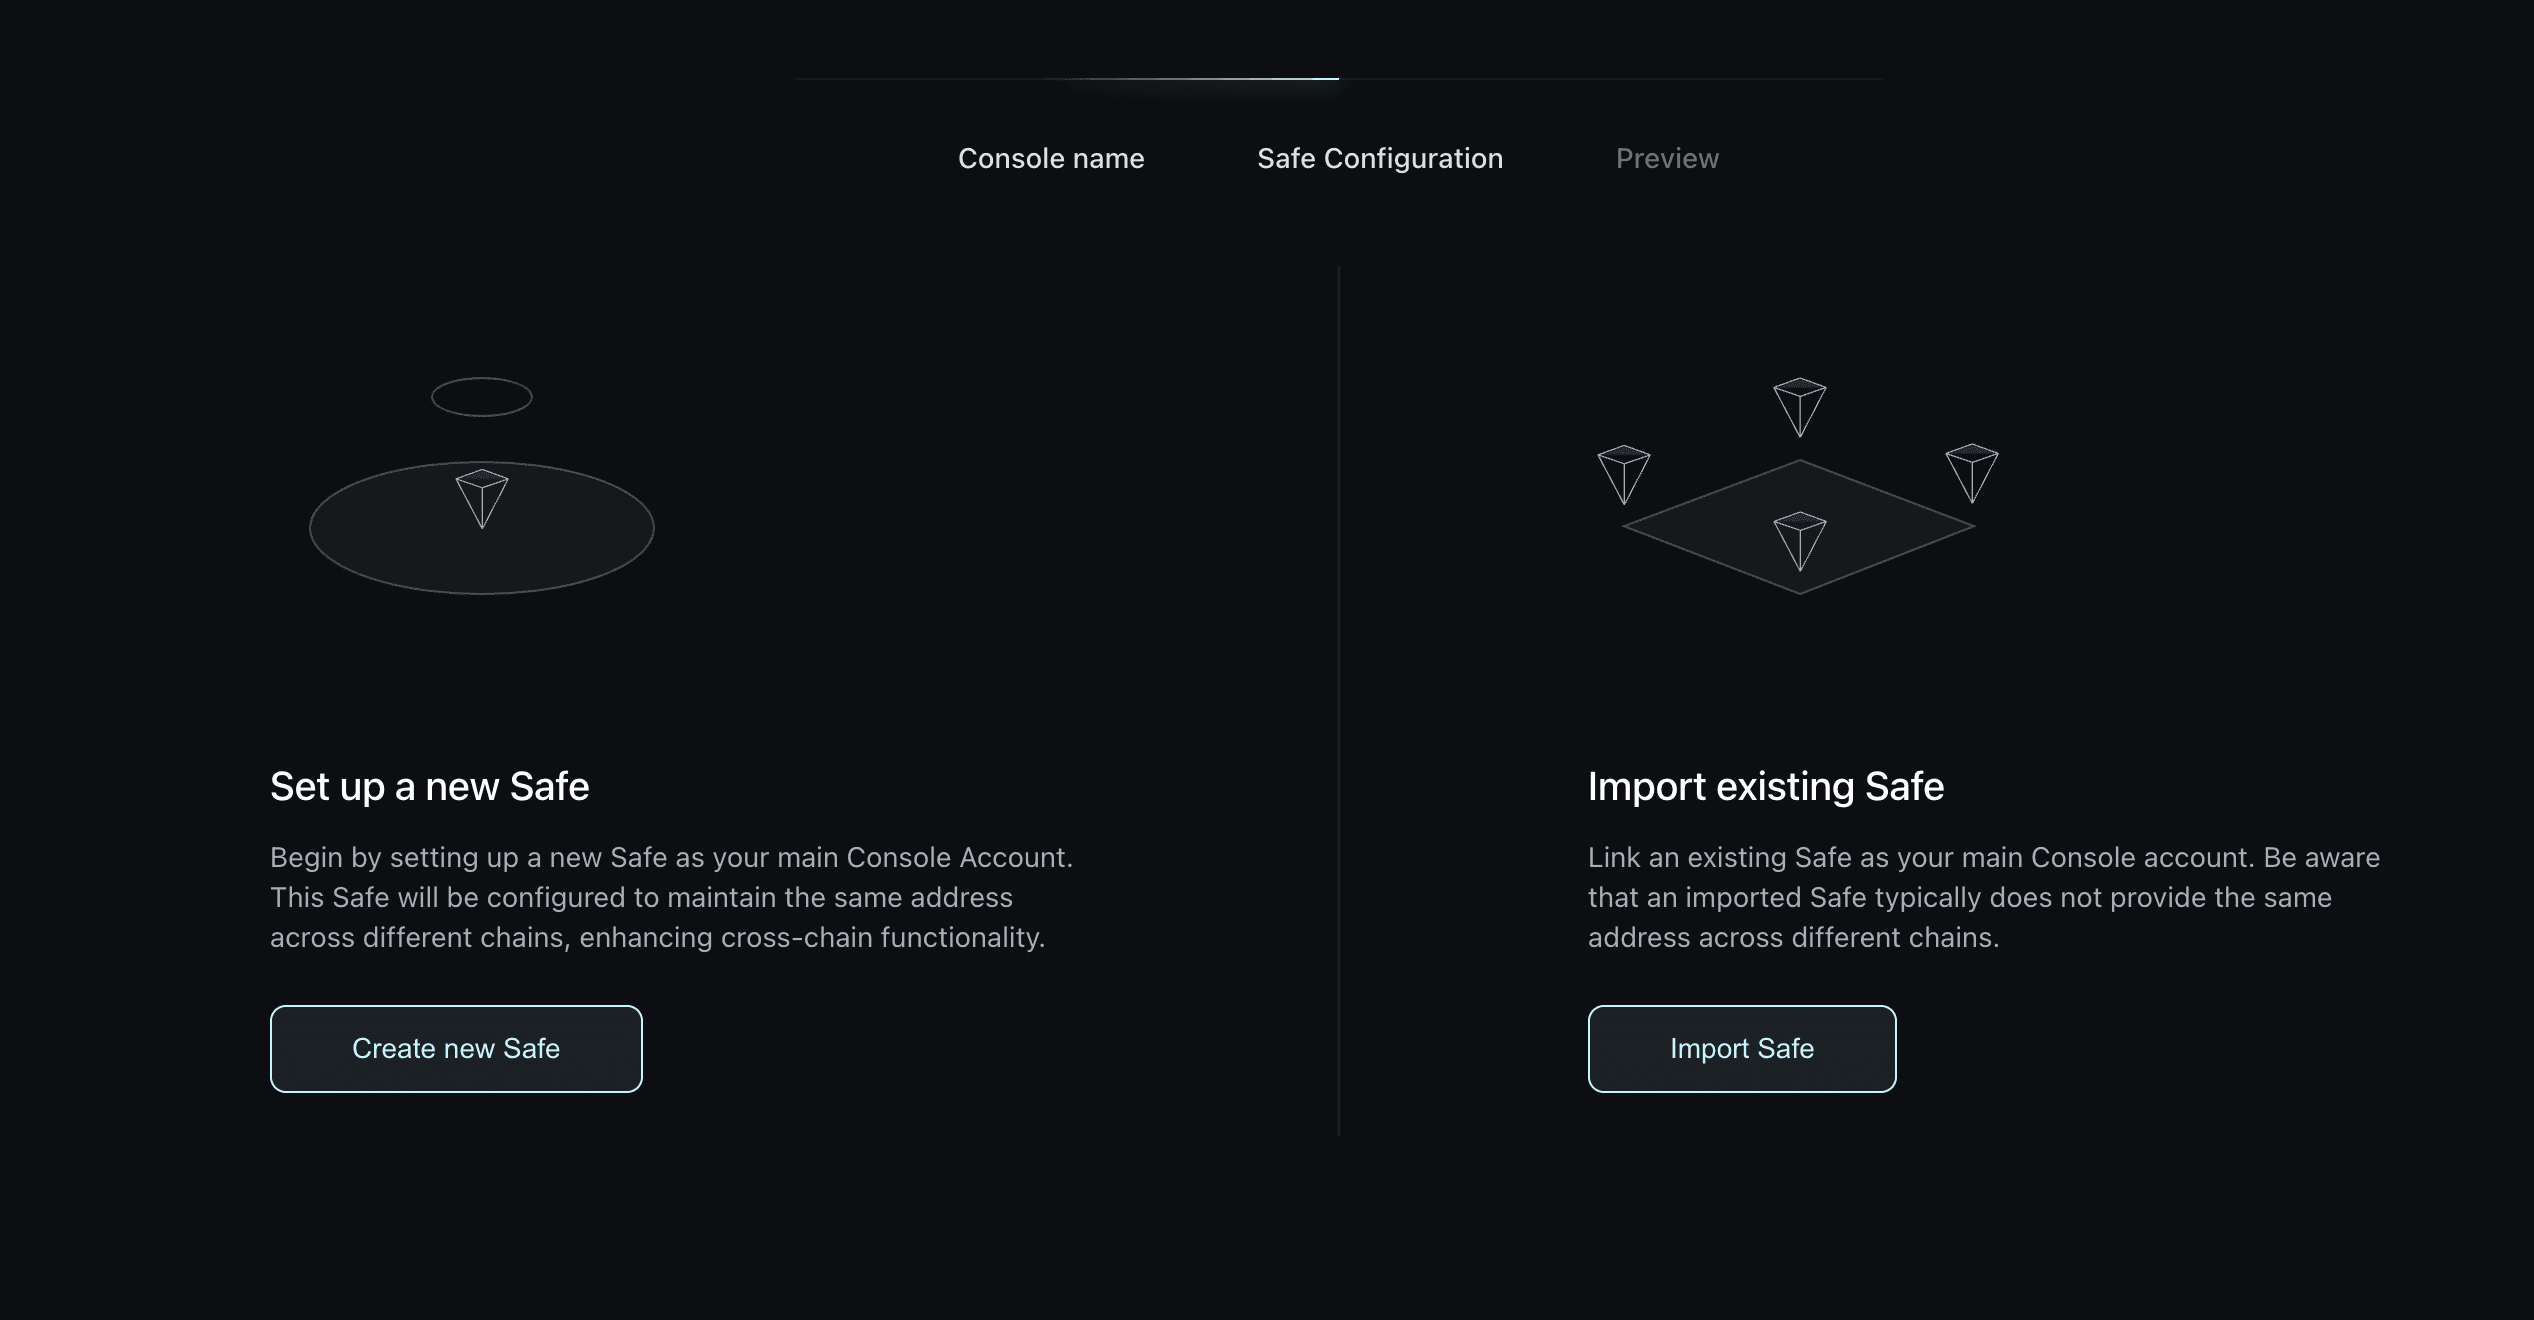
Step 2. Create or Import Safe
Once signed – you’ll be directed to a short explanation page, and then you’ll be able to either Create a new Console or Import existing Safe.
The owners of the newly created or imported Safe will be the owners of the Console.
For instance, if a 4/7 Safe is imported, the 7 owners will be the Console owners and the 4/7 signature threshold will be required for all administrative operations.
Setting up Sub-Accounts.
Controlling Accesses.
Creating Policies.
Removing or Adding new members.
As such, the main Console can host several Sub-Accounts, which can be configured according to the actions and tasks required. This allows teams to create and join multiple Safe Accounts, improving delegation, control, and team collaboration.
If you create a new Safe, you will then be able to set the owners and the execution threshold in advance. Bear in mind: this Safe will control all of the Sub-Accounts in the Console environment.
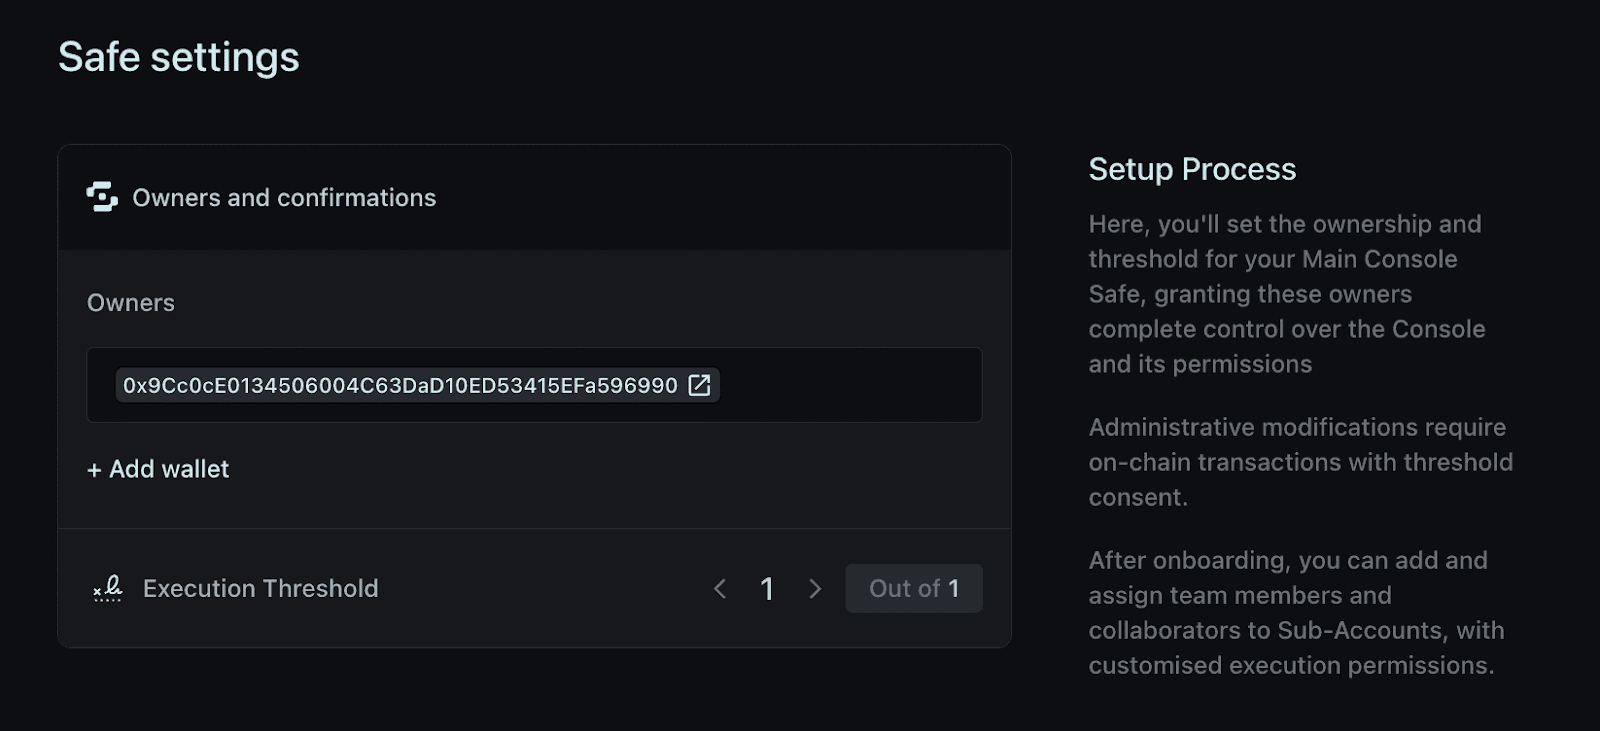
Sign the transaction and you are done: a new Safe is created!
Both in case of a new or imported Safe, they have no custom installation from Brahma: they are normal Safe that the users can access at any time at Safe.global.